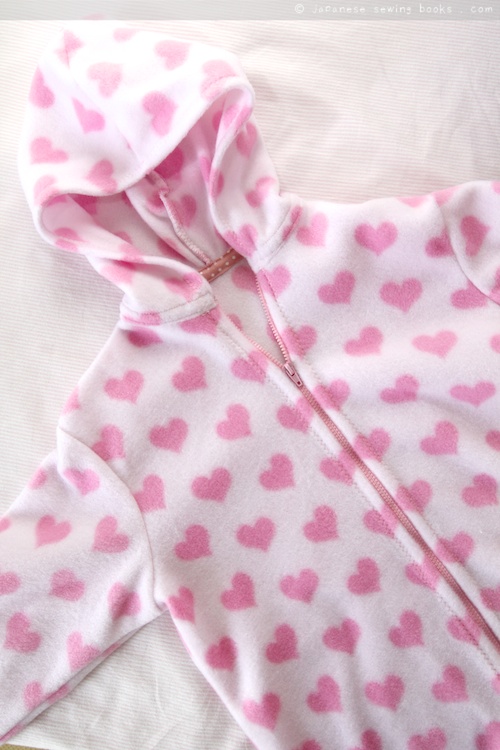
Finally as promised, the fleece jacket with free patterns, step by step photos and a sewing video! Unlike the previous few sew-alongs, I didn’t announce this before hand, because I just wanted to post it here for anyone and everyone to read and sew whenever they feel like it. It really doesn’t matter when you join in. I hope to make this a regular feature next year. In fact, I’m going to be re-organizing things a bit over here but more about that when I get back. As this project is rather timely for the cold weather, I’ve decided to post this up first.
Today’s project includes
- Free patterns for download
- A “how-to-make” with step by step photos
- A sewing video on youtube.
A fleece hoodie jacket
With a nicely finished neckline on the inside
All ready?
One thing I would like to say before we begin is that I’m not a professional, and I’ve not even been to sewing school (2 semesters of Home Economics when I was a teenager doesn’t count right?). Everything I learned about is from books, the internet, and the hard way. So the way I do certain things might break the traditional sewing rules (especially how I attach a zipper!) but I’ve tried many ways and this is my favorite way of doing it. If you have your own favorite method, by all means do it your way! 🙂
There are only two sizes available at the moment, because I only drafted these two sizes for my girls. The jackets are loose fitting though, as it is meant as an outerwear. So it can fit a range of ages from 3-8. (My older girl is 8, and taller than 116, but because it is loose fitting, I made 116cm and extended the hemline.)
Here are a few things to take note about the patterns.
- The patterns are larger than a single sheet of paper so they are created in multi-page PDFs. You will need to print them on A4 size paper and piece them together with scissors and tape/glue.
- ALL SEAM ALLOWANCES ARE INCLUDED (Don’t mean to shout it out but as this is not the norm in Japanese sewing books’ patterns, I thought it was best that I highlighted this point. It is one of my pet peeves to trace out patterns and manually add on seam allowances, so I really prefer having seam allowances included in my patterns. In the future I should be sticking to this format. I have also highlighted the seam allowance on the pattern in light gray so you can visualize the actual sewing line.)
- Remember to select A4 as your paper output size when printing, instead of Letter as the different sizes may truncate certain parts of the joining lines. Do not select scale-to-fit option. It should print nicely at 100%
- Use recycled paper if you can, because you are going to cut most of it up.
- I spent hours putting this together, so please do not copy or redistribute it as your own. You are certainly welcome to link back to this post and credit the source to me 🙂
Please download the files from my PDF pattern store – PorcupinePatterns.com
Notes for printing
- Size 104cm Fleece Jacket Pattern (Requires 11 pcs of A4 size paper)
- Size 116cm Fleece Jacket Pattern (Requires 11 pcs of A4 size paper)
- How to make with step by step photos (You don’t have to print this out if your computer is near your sewing table, try to save paper! Maybe you can even download the PDF onto your ipad as an ebook and use it as a reference. Using it digitally as a PDF also allows you to zoom in and take a closer look 😛 But if you must, it takes 8 pages to print.
Materials
Fabric
For this project, I used about 1 yard of polar fleece, with plenty left over. I bought this heart shaped polar fleece from fabric.com. I don’t know if there are more of the same, but you can find lots of different designs for both boys and girls.
Bias Tape
This is for covering the seam line between the hood and the bodice.
You can make your own out of scrap fabric or buy ready made ones like I did. If you are making your own, you can use bias tape makers like these , I use a similar one from Clover and they really help get the job done much faster!
Open End Zips
These are also called Separating Zips / Jacket Zips. Here’s a listing on amazon for reference.(affiliate link)
One more thing I used in the video that I get lots of questions about. They are Clover wonder clips and I use it all the time when sewing. They don’t leave marks or holes in your fabric like pins do, and there are also seam guides on the clip that help with clipping up seam allowances. Best of all, with young children in the house, clips are a lot safer than pins!
Got your patterns printed, materials complete, fabric cut out and ready to sew? Here’s the video!
Right now as this post is being published, I am on my way to Sapporo. So I will only be able to check and answer any questions when I get connected, sorry about that!
In the meantime, Happy Sewing! 🙂