Browsing Tag

Atelier to nani IRO

Book Flip Through Videos Book Reviews Japanese Sewing Books

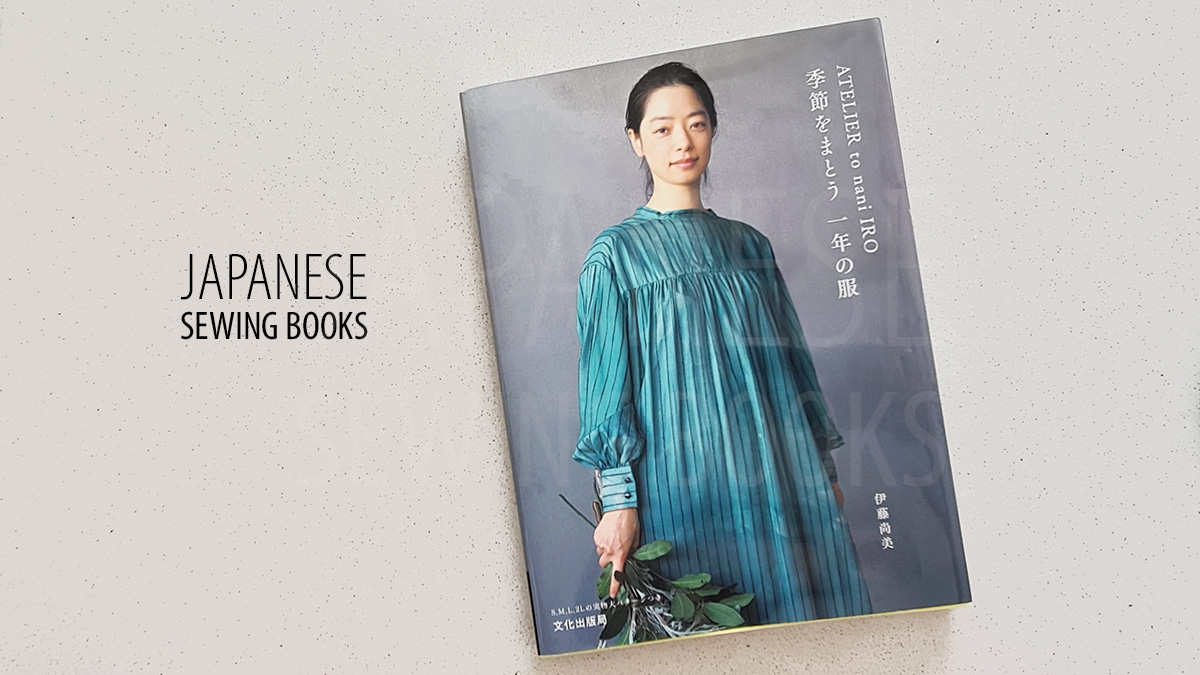
Book review of ATELIER to nani IRO’s Seasonal Clothes for the Year

March 24, 2021

I know it’s been a while since I’ve posted any book reviews. But I HAVE been buying books. And this latest book from ATELIER to nani IRO which was very recently released definitely warrants a book review. I know many of you have been waiting to take a peek inside this one!
Disclaimer : This book was gifted to my by Nekoneko Fabric in exchange for a blog post and review. You can find this book listed in her store plus all the yummy fabrics used in the book as well! 

It’s been 3 years since the last sewing book from ATELIER to nani IRO so I would say it’s about time! This time round, the book’s launch coincides with the 20th anniversary of Naomi Ito Textile nani IRO, and all the projects in the book are based on the new fabrics released this year. The book includes 18 projects ranging from simple clothes for everyday wear, interesting designs that are a special and unique, and it comes with full-scale patterns for 4 sizes – S,M,L and 2L.

You will find pictures of the same pattern made using different substrates, as well as staff recommendations on coordinating different pieces together, to create an all year round wardrobe using nani IRO fabrics. Projects range from easy to advanced difficulties, from simple smocks that beginners can complete in a day, to dresses with elaborate details that you might want to make for special occasions.
I will share with you some of my favorite pieces, and also translate the full list of garments you can make from this book.

A – Cocoon smock
B – Cocoon knit dress
C – Bias tank top
D – Cocoon Short Haori
E – Freedom vest
F – Stand collar tuck dress
G – 2-way shirt
H – 2-way shirt tunic
I- Radio Tuck Dress
J – W wide pants
K – Farmers’ pants
L – Tapered pants
M – Antique skirt
N – Cache-coeur robe short sleeves
O – Cache-coeur robe eight-quarter sleeves
P – Cook dress
Q – Gathered dress sleeveless
R – Gathered dress long sleeves

First up is this very simple Cocoon smock. It reminds me of the famous Cocoon dress from the previous book, but in a shorter version. It is definitely a shape I would pick for everyday wear. Much more so than the dress length, so this goes in my sewing list!

F is a Stand tuck collar dress featuring a stand collar, and lots of interesting tucks for example along the shoulder, waist as well as the back. It is a very interesting shape and I am really quite curious how this would turn out when worn.

P – Had a bit of trouble translating this one. When I keyed it into Google translate, コックドレス is translated as Cock dress… Lol… I knew it can’t be right, so I searched for images instead. So apparently it meant a Cook Dress (Cook’s dress) or rather, a Chef’s dress. Because if you search コック the images returned are all of Cooks/Chefs. Anyway the front panel is inspired by the Chef’s coat, and I really like the look of this one, although I feel the belt looks a little makeshift.

On the right the model is wearing J – W wide tapered pants below the dress.

N – I love the front detail of this Cache-coeur robe short sleeves (Hang on let me search Wikipedia)

Cache-cœur (French for “hide the heart”) is a top for women, composed of two finished triangular parts, each having a strap. It is closed by overlapping the two segments and tying the straps behind the back or along the side, depending on the length. The triangular shape of the sides makes the garment a type of V-neck.
Source – Wikipedia

Most pics I found for Cache-coeur online are like V-neck wrap tops, so this style is an interesting and also modest play on the wrap style. It is very interesting indeed! On the right picture it shows the robe paired with L – a pair of tapered pants.

On the left we have A – the cocoon top in cotton silk (Love this color!) and the bottom is M – antique skirt in a Rexcell. The draping of both fabrics look great. What a casual but luxurious outfit!

On the right is Q – Gathered sleeveless dress. This reminds me a bit of the Work dress in the previous book. But the design is entirely different. There is a yoke with a gathered bodice, and also front ties that you can choose to leave untied for a more rebellious look.

H is the 2-way shirt tunic. This design comes in shirt length and tunic length. And the 2-way refers to wearing it either front to back or back to front. What a great way to get two looks out of one garment! 😆

There is a section that shows you all the garments made from different substrates, grouped by pattern name. This gives you an idea of how the finished piece will look in different fabrics. I think this is a really really good marketing tactic because it really makes me want to buy more fabric.

2 double sided full size pattern sheets. Do note that Seam allowances are NOT included, so you have to trace out the diagrams and then add them on following the individual pattern instructions.

And here’s the size chart for your reference. On the left column (bottom 4 rows) it says – Height, Bust, Waist, Hip. All units in cm.

There are more projects in the book but I can’t cover them all here, so I will leave you to browse through in the book flip through video below.

Where to buy

I get asked this alot so I will try to list down a few possible sources.

  1. From Nekoneko.co – https://www.nekoneko.co/products/atelier-to-nani-iro-2021-sewing-pattern-book
  2. cdJapan – Click here to buy now (Affiliate link)
  3. Amazon.co.jp 
  4. Or your local Kinokuniya (they have different websites for different countries, so you have to search from the one located in yours. If they don’t have it in stock they can order it for you at no extra cost, but you may have to wait.

Japanese Fabrics

Japanese Fabrics – nani IRO 2019 new designs

March 2, 2019

The month of March is usually an exciting one with lots of new book and fabric launches, in particular, the new nani IRO collection! Just like the previous years, I will have to split up the collection into different posts. Today’s post will cover the all new designs for this year’s collection. In subsequent posts I will be covering – a shrink test for a couple of new substrates, as well as my makes and new fabrics in the basic and colors range. Continue Reading

Book Flip Through Videos Book Reviews Japanese Fabrics Japanese Sewing Books

Atelier to nani IRO’s Sewing Closet – Book Review and Flip Through Video

March 1, 2018

It’s the time of the year again when the new collection for nani IRO fabrics ship. And this year there is another reason to be excited. After 10 years, she has finally released a new sewing pattern book! (You can read the review of the first book here. )

All the fabrics used in the book are from the new nani IRO 2018 collection. I will be going writing up on that once I get my hands on the fabric. And since we will be practically talking about nani IRO collection the whole month, I would like to declare this month of March 2018 – nani IRO month again!

naniIROmonth2018_sm

I first came up with this idea back in March 2013 where I dedicated the entire month to nani IRO related posts, and oh my has it been 5 years already??? What will I be doing for nani IRO month? First of all, this book review, followed by a post on the new collection this year, and finally my very own makes!

In the meantime, let’s get inspired and hopefully this will help you decide which fabrics to get too! (If you haven’t ordered already)

cover

This time round it’s for ladies only. Sizes S, M&L, L+ and 2L are included. It’s a little confusing, but I will explain later with the size chart at the end of the book review.

innercover

There are patterns for tops, pants, skirts, dresses, pantsuit, hats, coats and shirts. Well practically everything. It is the Sewing Closet book after all!

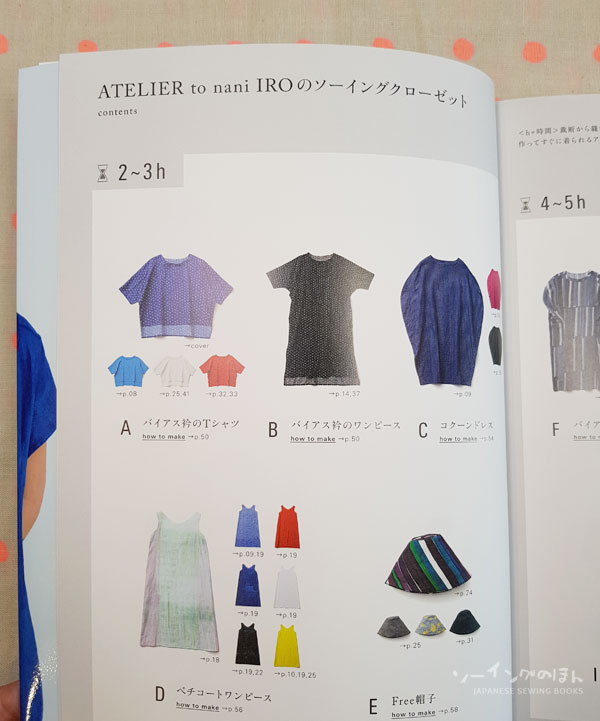
contents1

The projects are grouped based on difficulty of making – as indicated by the approximate number of hours you will need to make the garment.

A – Bias collar Tshirt
B – Bias collar Dress
C – Cocoon dress
D – Petticoat dress
E – Free Hat

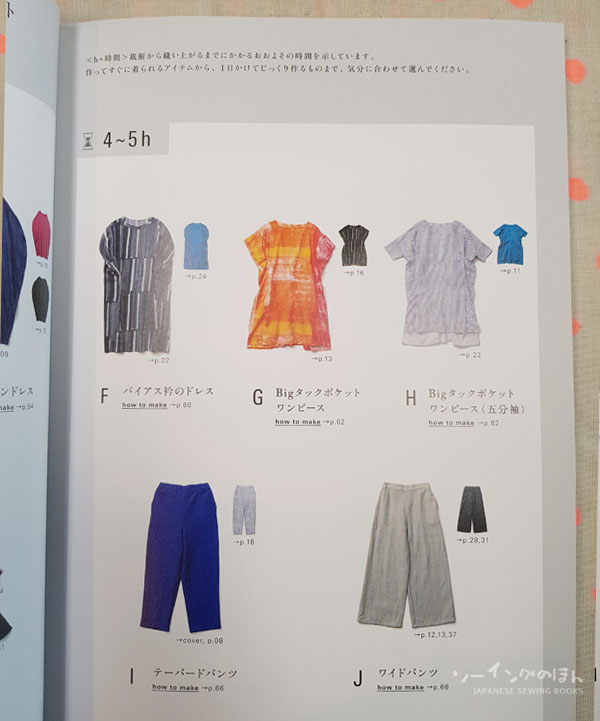
contents2

F – Bias Collar Dress
G – Big Tuck Pocket Dress
H – Big Tuck Pocket dress with half sleeves
I – Tapered pants
J – Wide Pants

contents3

K – Tuck Silhouette Dress
L – Side pocket Long Skirt
M – All in one
N – Work Dress

contents4

Q – Spring Summer Staff Coat
R – Autumn Winter Staff Coat
O – Work Dress (3/4 sleeves)
P – Work Shirt

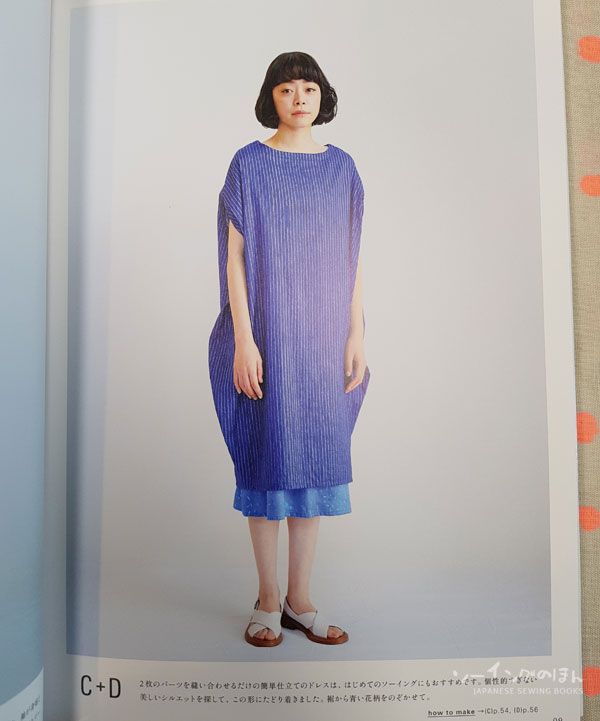
CandD

The outfits for each page are labelled below. Here is the Cocoon dress with the petticoat dress worn underneath. The main fabric on the dress is Camino in Double Gauze.

grace

Big Tuck Pocket Dress in Grace (Linen)

G+J

Dress G in Ripple (Linen)

situation

Dress K in Situation (cotton sateen)

M

M – All in One. This is basically like a pant suit. It is quite interesting and looks cool on the model. But I’m not so sure I can pull off the look myself 😛 The fabric is Situation (Linen)

buttonskirt

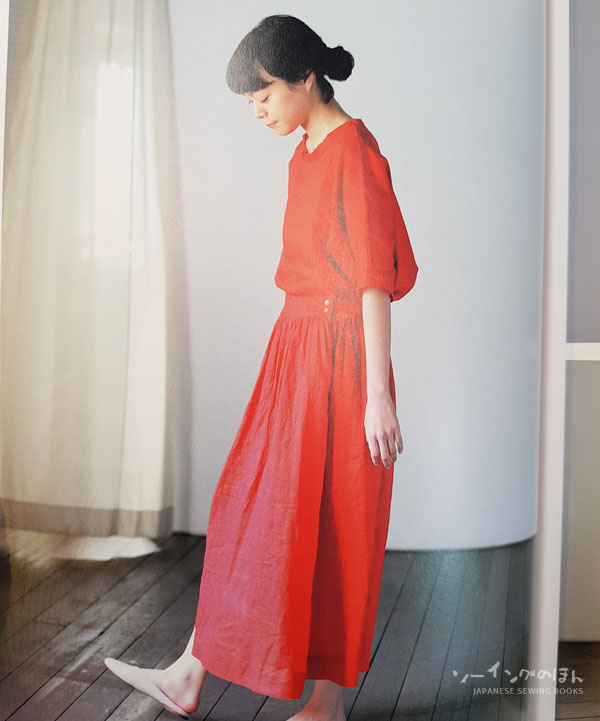
Other than prints, there is a range of solid color fabrics under the new range – Naomi Ito Colors. You can find many different subtrates here – Linen Cotton, Cotton Sateen, Cotton Linen Herringbone, Linen, Cotton Linen Brushed Herringbone (something like the the wool used for men’s suits). The above skirt with side buttons, is made using the solid Linen color – French Red.

rakuenskirt

One of my favourite designs – Fuccra Rakuen is released in new colors and substrates this season. Seen here is the blue linen version, made into skirt L.

shirt

Work shirt in Camino linen.

coat

Another one made using Situation linen – this is a lightweight coat for Spring/Summer.

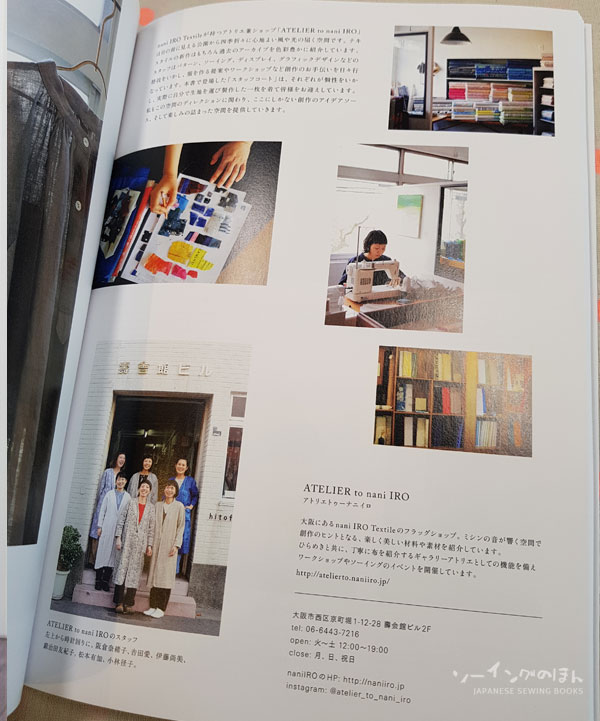
Some pictures of the Atelier to nani IRO in Osaka. If you ever have the chance to visit and need directions, see my blog post here – Directions to Atelier to nani IRO

AteliertonaniIRO

and now for the size chart. I’ll translate the important information below to help you decide which size is best for you.

sizechart

Choosing the right size
* The attached pattern sheets are for the 4 sizes – S/M&L/L+/2L
* Some items may be grouped into 3 different sizes S/ M&L, L / 2L
or grouped into 2 sizes
– sizes S / M&L, L+, 2L
– S, M&L, L / 2L

Size table (units in cm)
Japanese Text in Left most column
Body part / Size
Height
Bust
Waist
Hip

Confusing???   I was confused too… until I looked at the pattern sheets. Basically, first find out which size you belong to, first refer to the size table (above). You will notice there are overlaps in some of the measurements for some of the sizes. My guess is that it is done this way because most people don’t fall neatly into a particular size, so the table gives you a better idea if you should choose one size up or down based on all of your measurements.

The next thing to note is that, not all the pattern sheets come in the 4 sizes listed above in the table. Certain items have patterns that come in 2 sizes and some in 3 sizes – which means that some of the sizes are grouped into one pattern sheet.

For example, the first pattern A – bias neck T shirt, comes with 2 pattern sizes only. Sizes S, M&L and L+ make use of the smaller pattern, and size 2L uses the larger pattern.
The second example is more straightforward F- Bias neck dress – this comes in 4 separate sizes patterns, S / M&L / L+ / 2L.
The 3rd example is N – Work Dress. This comes in 3 sizes. S / M&L, L+ / 2L

The easiest way to tell is from the material list in the how-to-make pages. If there are 2 sets of numbers, there are 2 pattern sizes, and so on…  The other way is to look at the sizes separated by the backslashes. I don’t know why it has to be so confusing… but that’s just the way it was written.

There are many more garments in the book that I could not post here, so have a look at the book flip-through video!

ATELIER to nani IRO sewing closet / Ito Naomi

Title : Atelier to nani IRO’s Sewing Closet
Author : Naomi Ito
ISBN Number : 978-4579116270

button_buy-now-from-cdjapan (1)

Buying Guide Japanese Fabrics

Directions to nani IRO Atelier

July 11, 2013

While the memory is still fresh in my mind, I thought it would be useful to jot down the directions to the nani IRO Atelier in Osaka. Some of you who might be heading to Osaka for a holiday might find it useful if you are going fabric shopping. It is definitely worth a visit if you are a big fan, because not only do they have the latest fabrics, there are also fabrics archived from the past seaons. There are limited prints and mostly pre-cut fabrics. There are also ready made Zakka goods (SUMAU nani IRO range) available for sale. In any case, if you are a fan, you will love it!

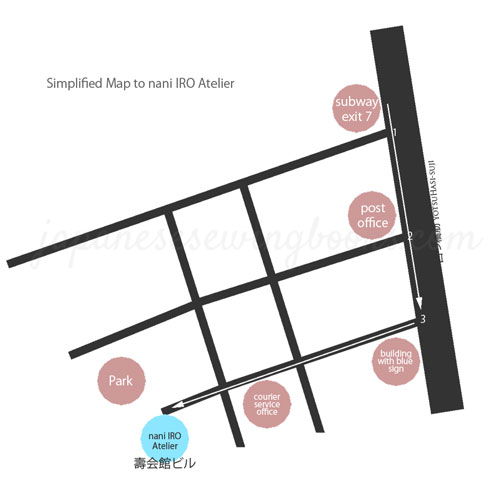
Before I left, I saved a copy of the map from their official site on my phone, but I still got lost. I think the main reason is because there were too many lines and road names and not many landmarks on the map itself. So I decided to create my own (at the bottom of the page) where you only need to know the major road to follow, and the landmarks to guide you along the way.

First of all, take the subway to the 肥後橋 (Higobashi) station. Here I am taking it from Namba station.


Click on image to view larger picture (picture from Google Maps street view)

Once you get to the station, follow the directions in the station, and look for Exit 7. You will emerge from the underground subway station via this stairs, landing right outside this shop called Aoki Men’s Plaza (see the blue sign in the picture above?) which sells Menswear. Walk in the direction of the green arrow in the picture. You will cross junction #1 after the green arrow.

Click on image to view larger picture (picture from Google Maps street view)

At the next block, you will see a Japan Post Office (Orange sign). Keep walking along the main road in the direction shown above. Walk past the Japan Post Office and you will cross junction #2 (see the crossing in the picture?)


Click on image to view larger picture (picture from Google Maps street view)

Just before the next junction (#3), you will see this brown building with a blue signboard. The name of the building is way up on the top, so I didn’t see it at first. And the alley didn’t look quite right, as there were no visible shops from the main road. But this is the right turning, so turn into the alley and walk straight ahead.


Click on image to view larger picture (picture from Google Maps street view)

You will pass by a open air public carpark on the left. Keep walking down the alley.


Click on image to view larger picture (picture from Google Maps street view)

At the next block you should see a courier service office (with the blue sign) on the left. This is were I asked for directions because I just wasn’t sure I was on the right track. But it is the right way, so keep walking. You will need to cross another junction after this block with the courier office.

Click on image to view larger picture (picture from Google Maps street view)

After crossing the junction, you should see quite a large neighbourhood park on the right. On the left there is a row of low buildings.

The white one! The name of the building is 壽会館ビル – which you see in gold words. Atelier to nani IRO is on the second floor. See the flag hanging from the window? I almost missed it because there were some trucks parked in the building before it. Anyway, enter the building and you will see a steep flight of stairs on the left. Take the stairs to get to the second floor. and there you are!

No photos allowed in the store, so this was the first photo I snapped on my mobile after shopping. It’s a big bag. And they wrapped it in plastic carefully because it was raining.

Back in the hotel, admiring my purchases, wishing I bought more 🙂

Carefully wrapped presents for two very lucky friends.

Click on image to view larger picture

Here is the simplified map. One thing to note, the instructions on the official site said to get out at Exit 8, but Exit 7 is actually nearer.

Photo credits : Many of the street view photos are taken from Google Maps and I added further directions. It was raining cats and dogs on the day I went, so it was impossible to take any photos with my DSLR and hold an umbrella and find my way at the same time. The street view feature on Google Maps is quite amazing. you can try it for yourself and see.


View Larger Map