Browsing Category

Finished Projects

Finished Projects Giveaways Japanese Fabrics

Liberty Art Fabric – Shoulder and Clutch Bag

October 2, 2016

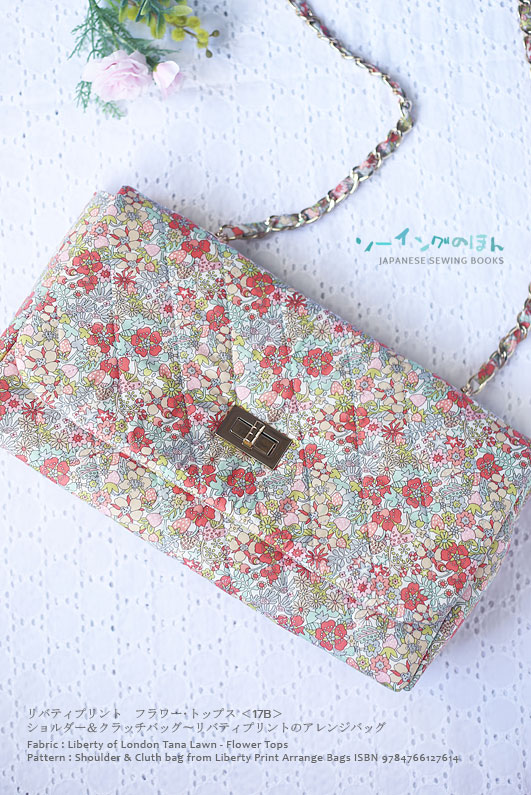
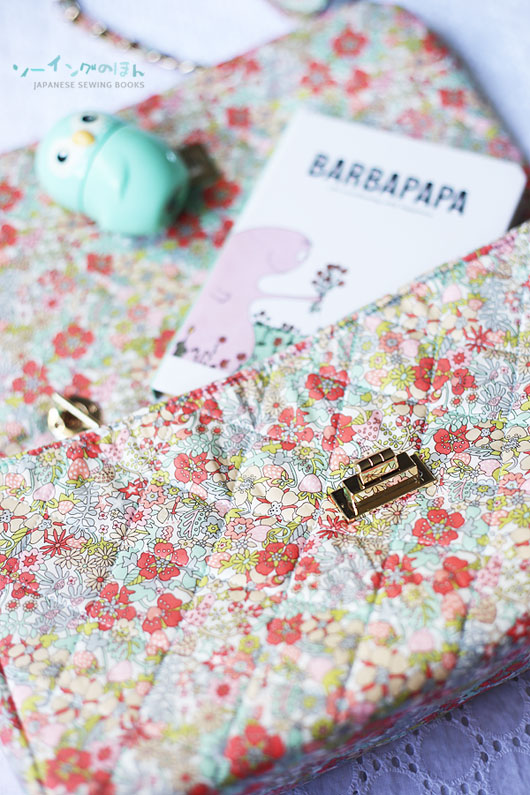
As promised here are more photos of the bag I made with Liberty fabric. I followed the dimensions of the bag as given in the book, but with some adaptations of my own. In the book, the bag didn’t look quilted, or at least you can’t see it because the fabric was a dark colored one, but in the instructions, all of the bags in the same series needed to be quilted, so then I decided to make some variations to make it look like THAT famous quilted bag? 😛

libertyprintshoulderbagfull

libertyprintshoulderbag3

libertyprintshoulderbagopened

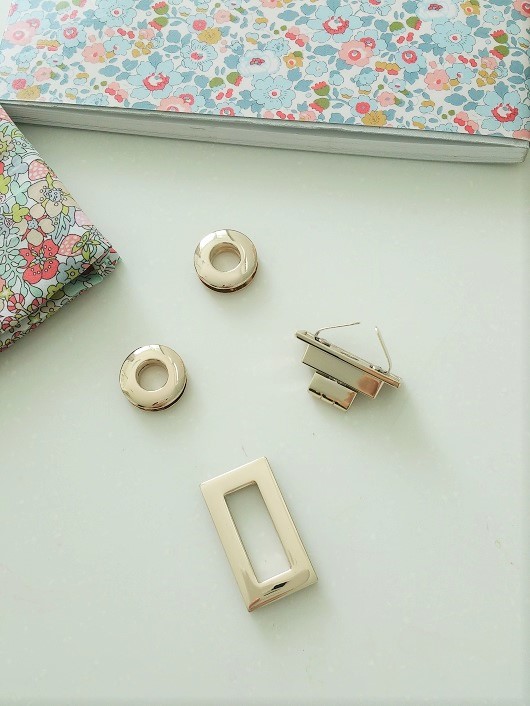
The original pattern called for a silver chain and used magnetic clasps which can’t be seen from the front of the bag. I thought it made the bag look a little plain, so I decided to use sparkly gold hardware instead. These were the ones I used. 2 screw on grommets a twist lock (some call it a turn lock), and a chain for the bag strap. All in light gold, which went perfectly with the colors of the Liberty fabric.

hardware2

hardware

Here’s what the grommet looks like from inside the bag. You need to cut through the bag to make a circle that fits nicely within the hole, then the grommet encases the opening and you screw it on tight. Same goes for the frame of the twist lock (the rectangular frame that I propped the grommet on in the picture above). The twist part of the lock (shown in the background, is attached on like a magnetic clasp, with two prongs bent over a metal plate, so that was much easier to attach as I only needed to make two slits.

The light gold hardware took me hours to assemble, as it was quite hard to cut through all the layers of fabric and interfacing. I used one layer of fabric, over batting to give it the quilted appearance, followed by a layer of fusible foam to give the back structure. Then there was another of lining fabric. My fingers were in pain after I was done.But the results are so worth it!

goldhardware

The bag chain is attached to the bag with T-bars at the end. From the outside of the bag it looks like this (pic above), and from the inside of the bag (pic below) you can see the T-bars. You can also see the mint blue cotton sateen that I used for the lining.

libertyprintshoulderbagbluelining

I made a strap of matching fabric to weave through the chain, inspired by THAT famous quilted bag.

libertyprintshoulderbag2

So now I have a Limited edition, one-of-a-kind quilted bag with sparkly gold hardware, perfect for both casual or even dress-up days! What do you think? Isn’t it gorgeous? 🙂

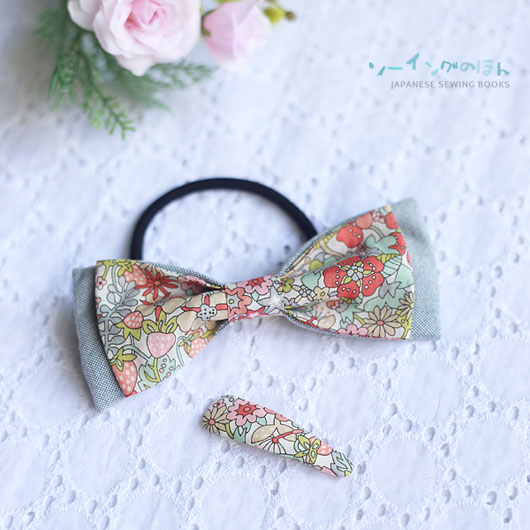
I still have quite a decent amount to make a couple of pouches and maybe even another bag. But I will keep it till inspiration strikes, and in the meantime, nothing ever goes to waste with Liberty fabrics. There was very little wastage when cutting out fabrics for bags since they are usually rectangular in shape, but around the odd corners or near the selvedge you always get little strips of fabric left over. Luckily, I have lots of Japanese sewing books that use small Liberty scraps for sewing projects. So I made the scraps into this hair tie + hair clip ensemble.

libertyprinthairaccessories

This was the book that the pattern came from. I will post a book flip-through on my instagram feed soon so do follow me on instagram to see more of this and other books!

libertyprintbagcover

Liberty Print Bags by Minakawa Akemi (affiliate link)

After sewing with Liberty fabric, I truly understand the hype now. One interesting observation – I had the finished bag sans chain, sitting on my machine for about 2 weeks as I was waiting for my bag chain to arrive in the mail. I noticed when I looked at the bag from afar, the print looks like a beautiful peach shade with light florals, but when I looked at it closed up, you can see all the colors and details that go into the print and it does not look like a peach colored fabric at all. It’s as if my eyes were playing tricks on me, but it’s a really interesting effect. And the best part is, the fabric feels really lightweight and cool to touch, but it is also really hardwearing. With the amount of manhandling that goes into making a bag, some other fabrics would have shown signs of wear and maybe even start pilling. But the Liberty fabric was so tightly  and finely woven, you can hardly see the weave and even the fraying was minimal.The fabric also came nicely folded in a tiny package and that’s how I’ve been storing it, but surprisingly there were no hard creases when you unfold it, the fabric is easy to iron and smooth as silk, but cool to touch. What is this sorcery??? I can understand why so many Japanese love to use it for their garments. It’s really luxurious to touch and yet it feels like it will last forever.

I know I was sponsored this 1m of fabric, but the opinions and raves are entirely my own. I’m already plotting to buy more, enough to make MYSELF a nice top. Sure it will be more expensive than your regular fabrics, but it will not cost more than a factory-made mass-produced store-bought garment. And I know it will really last me for a long time provided I don’t upsize in the future 😛 If you are intimidated by the price, you can start with a small amount. The fabrics are sold from a minimum size of fat quarter, enough for making a small tote or a few small accessories.  Or, you can try your luck, take part in this giveaway sponsored by Elizabeth Little , win 1m of this amazing fabric and fall in love with it!

wiltshire


Finished Projects

Handmade Zipper Pouches for Teachers Day

August 31, 2016

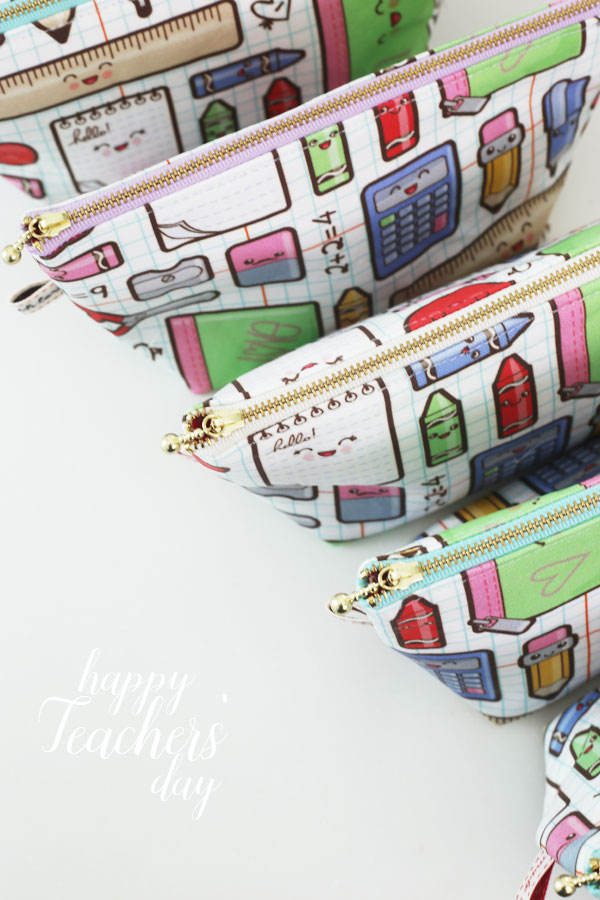
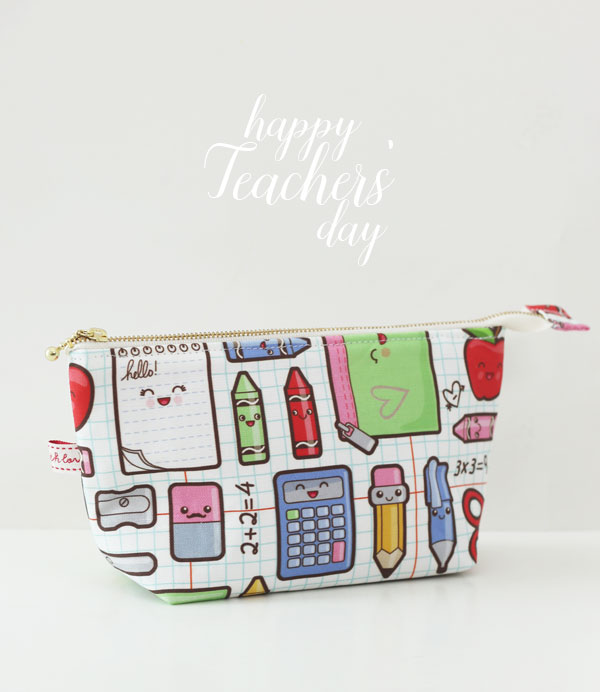
Just a quick post to share what I was busy sewing up the last week. Tomorrow is Teachers’ Day Celebrations in school, and these are gifts for my girls’ teachers.

pouchesinarow

I don’t normally do this, as I prefer the girls to make their own presents. But as my oldest is getting ready for her major exams this year, the teachers have specifically told them not to buy or spend time on presents, after all, they would prefer them to be studying hard instead.

frontview

But thinking about how awesome her teachers were these past 6 years, and the fact that this will be her last year in school, I volunteered to make them presents!
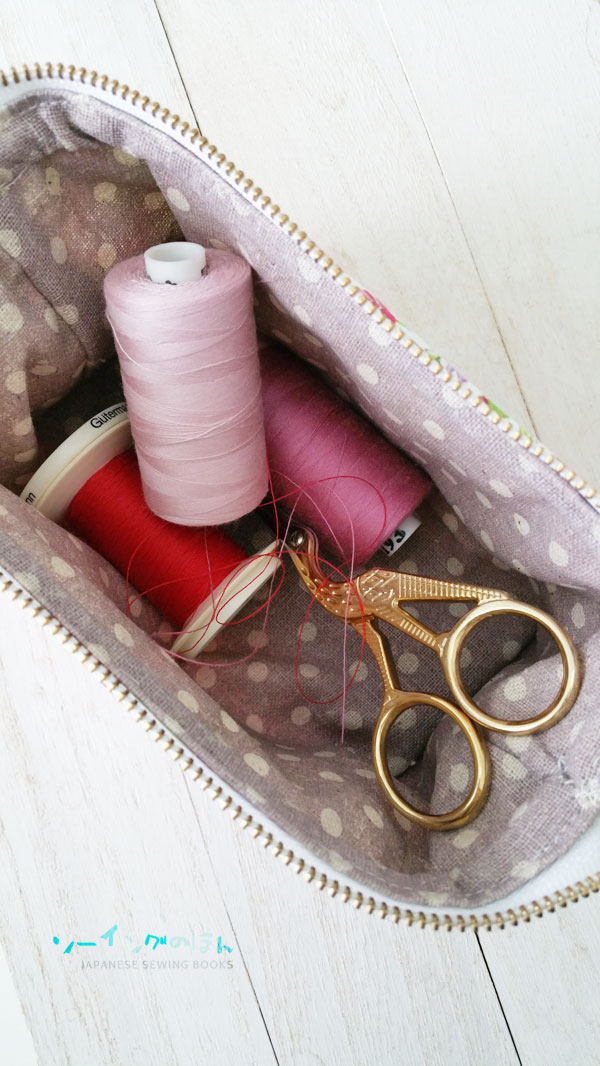
topview

I ordered a yard of fabric from Spoonflower. Well, I got my girls to pick out the fabric design in a school theme, and yup they chose the cutest one. I think it’s great and colourful and cheery. I used this pattern from Noodlehead – Open Wide Pouch, which has a big opening to allow easy access to everything in the pouch. I also used a stiffer interfacing which allows it to stand upright.

sideview

I referred to this Japanese sewing book on sewing zippers to sew my zippers neater, and used zippers from YKK with a ball chain zip. Yup my favourite 🙂

circle

That’s the end of my quick Teachers’ Day Sewing report.

In other unrelated news, there will be a Giveaway going on tomorrow so don’t forget to check back on my blog tomorrow!


Finished Projects

Mothers Day Sewing 2016

May 1, 2016

Mother’s Day is coming and I finally made something ahead of time! Those of you who follow me on Facebook may have seen some pictures of this pouch already, but here are just a few more pics for the benefit of those who are not on Facebook.

My mum will be going on a trip later in May and I wanted to make her a small pouch to hold her skincare/toiletries etc. I did consider making clothes, but making clothes as a gift will not be easy because there is the question of size (and taste in fabrics ;P), so I settled on something small, pretty and hopefully useful!

pouch1

pouch

framedpouchinner

lining

I chose this frame pouch because I love how it stands up on it’s own, thanks to the frames. I did not have to use super heavy interfacing to make it stiff. I used the usual medium weight interfacing that I line my bags with. Some of you asked me on Facebook, what type of frames I used too. I followed the example in the pattern and used some wire clothes hangers. I wished there were standard frames available though, as the ones I used were not very easy to bend to shape. However, it does allow for more flexibility in sizing since I can make the pouches in any size I want.

A quick Instagram video on how the frame pouch opens and and stays open. No more digging around as you can see everything at a glance. Follow me on Instagram if you have an account!

cottontimejan16_1

The fabric I used was a free sample by Cotton Kobayashi from the January 2016 issue of Cotton Time magazine, and the pattern for the framed pouch is in there too (see the tiny row of pouches above the words in red (at the bottom right corner of the cover). The pouches come in many sizes and shapes, and you can make a hidden frame handbag as well. I am so in love with this one that I think I will just have to make one for myself too!

Finished Projects

Sommer Easter Dress Challenge

March 31, 2016

I have been on a sewing spree. Like I found my sewing mojo again, I’ve been sewing non-stop ever since I got my new machine. It’s wonderful not to have to battle with uneven stitches on the back, lumped up thread, fabric-eating (feed) dogs. I can’t say it’s been completely smooth-sailing since with every new machine there is a learning curve, but I have been sewing faster than I can take photos of the finished products. Let me count off the top of my head, I have sewn 3 tops for myself from the book Couturier Sewing Class, a new bolero for my 8 year old (pattern from Cucito magazine), 4 nightdresses (and 4 more to go) from Kurai Muki’s Lock Machine clothes for kids, 2 new lunch bags (to fit in larger lunchboxes now that they are staying in school for lunches on certain days). And I’ve been quite slow on the blogging end because I just keep having new things to make. My girls need new aprons for art lessons, new totes for tuition classes, and my oldest is carrying her running shoes to school in a plastic bag because she lost her shoe bag on the bus. So I guess a new shoe bag is needed as well.

Anyway, I got my act together and took some photos for the purpose of showing you this new dress I made using the new fabric range called Sommer from Sarah Jane Studios. Those of you who have followed my other blog Cotton Candy, may have seen some of my creations using Sarah Jane fabrics. I can’t quite remember how long ago this started, but I have been a fan of Sarah Jane’s illustrations since 2008. That was way back before any fabric collection, and she was only selling prints, stationery, embroidery kits and some jewellery featuring her illustrations. Luckily, Etsy has a record of my first purchase – April 2008! That’s 8 whole years ago!

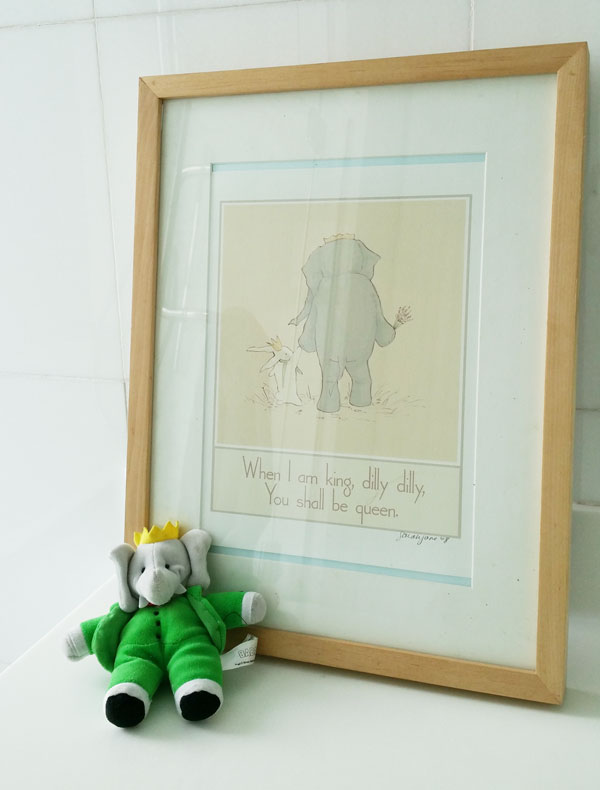
dillydilly

My first purchase. I love this piece. A song pops in my head everytime I see this. The Burl Ives version of course. Not the modern day Cinderella version.

mysewingcorner

This is my sewing space. The picture hanging right above my computer is a Summer Tea Party print by Sarah Jane. See the stack of fabric waiting to be sewn in front of my serger?

Fast forward to 2011, when the first fabric range was launched, and I was hooked.

http://blog.cottoncandy.com.sg/2011/10/quilted-cushion-cover-using-sarah-janes-fabrics/

I also made a couple of dresses using her fabrics (http://blog.cottoncandy.com.sg/2012/02/the-dress-that-got-stuck-in-my-head/)

My favorite piece was this! http://blog.cottoncandy.com.sg/2012/10/on-parade-dress/

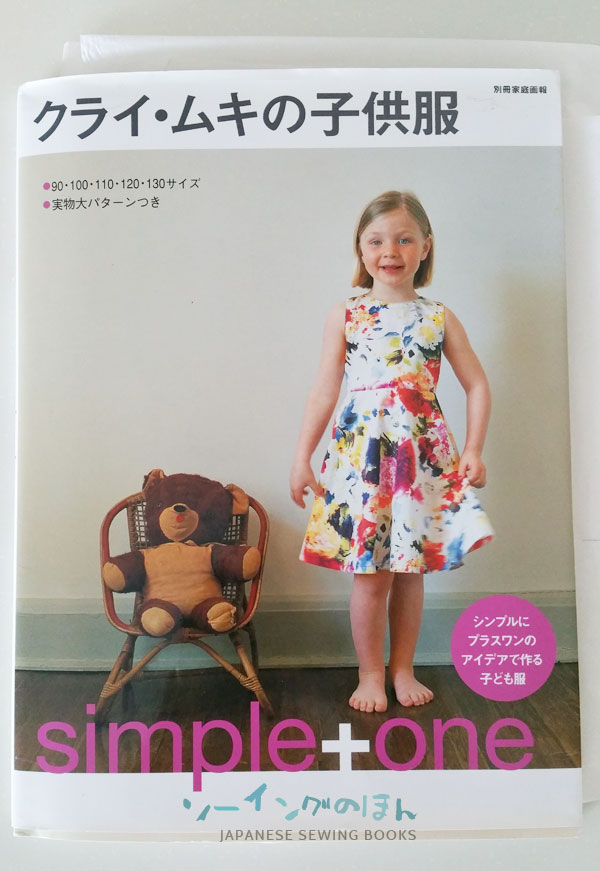
Unfortunately, my little girls are not so little anymore, and they won’t wear these girly or empire waist dresses anymore. It is quite sad for me too, knowing that very soon they will outgrow most of my girl sewing books which are usually up to 120-130cm in size. It was about the same time that I overheard them fighting to wear an old Gap shirt dress that they both love, though it was much too small for the older one. So I volunteered my services to make new ones for them. And coincidentally enough, I found a shirt dress pattern in the very same book the tiered skirt dress pattern came from!


kuraimuki

My trusty Kurai Muki book.

originalpattern

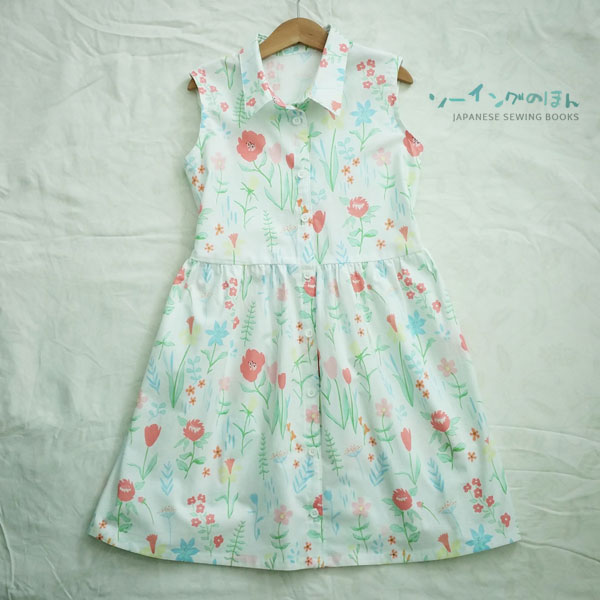
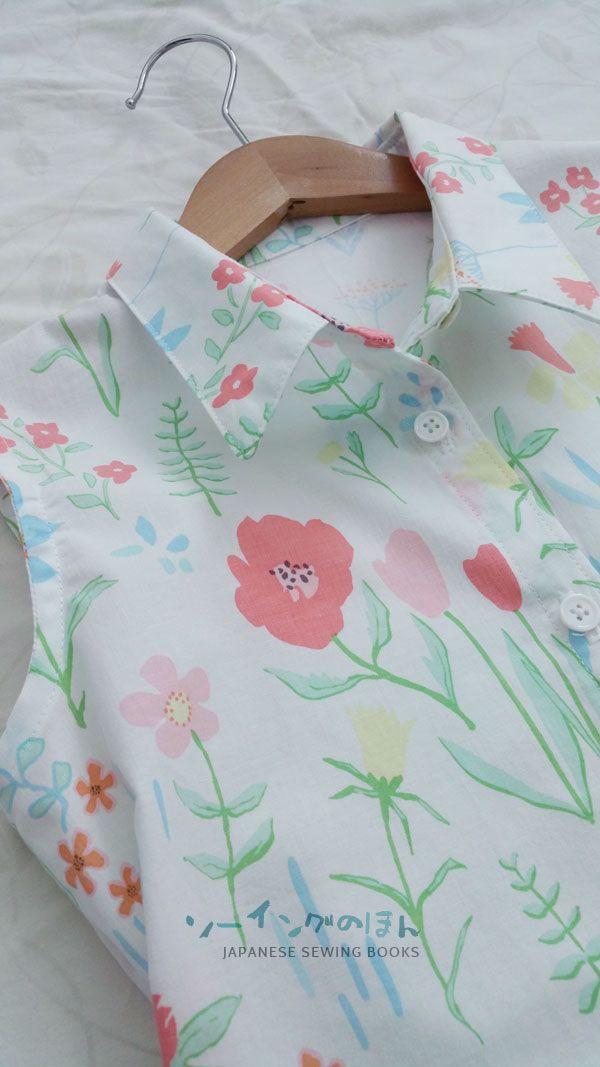
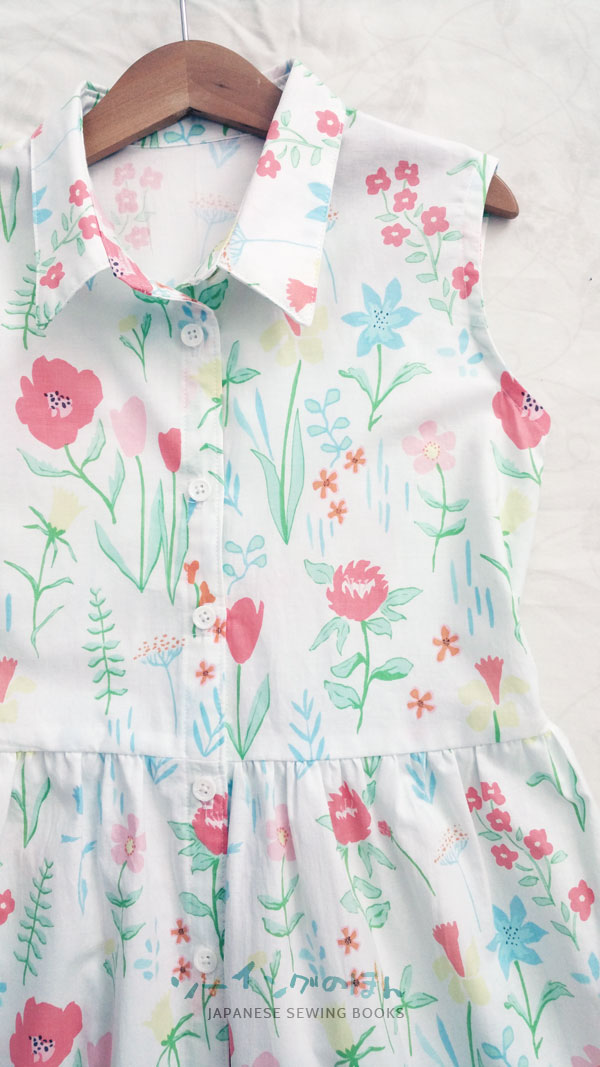
Here’s the shirt dress pattern. It is an A-line dress though, so I used the pattern for the bodice, and added a gathered skirt to the bottom. I had to trace the largest size 130cm for my 8 year old. For my older girl, I had to grade the pattern one size larger (140cm) in order to make it fit. So yes, she has officially outgrown this sewing book! 🙁

shirtdress

and here it is!

shirtdress1

shirtdress2

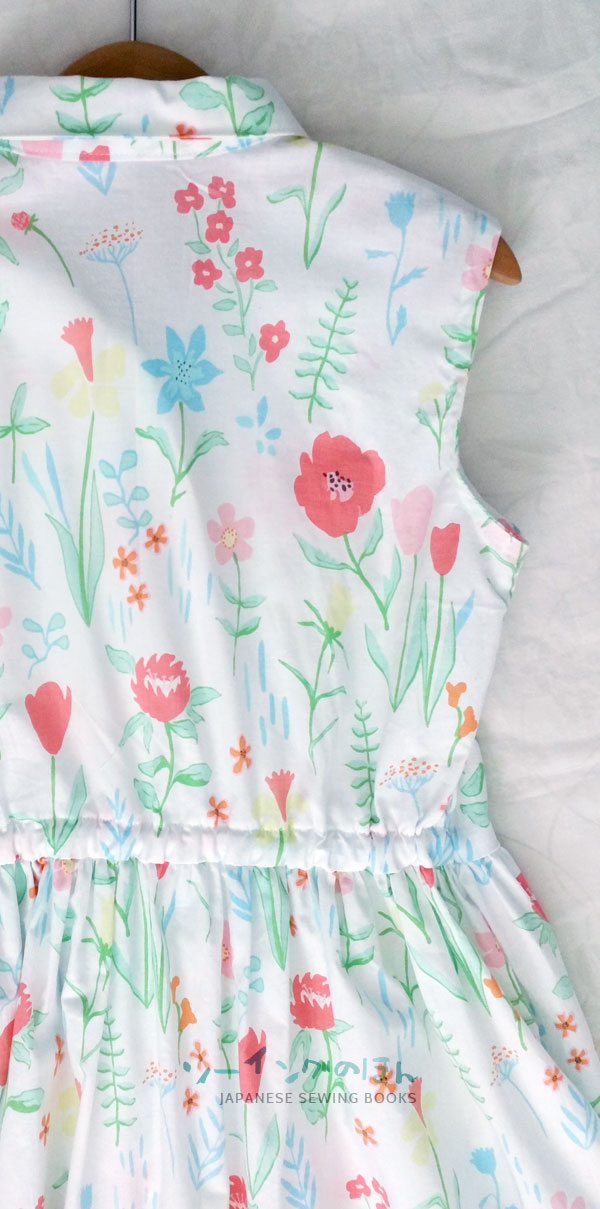
backofdress

To the back waist, I made use of the top edge of the back skirt to add a casing with an elastic band. This helps to create a more fitting look at the waist. I have a second dress waiting to be made, using painted Gingham in Robins egg. I’ve only got the pattern pieces cut out so far, so I can only hope there is time to sew it tonight and finish it soon!

Finished Projects Sew-along Sewing Tutorials Sewing Videos

Chinese New Year Sewing 2016

January 31, 2016

I have not been blogging for the past few weeks, but I have a number of reasons to be very very busy. Chinese New Year is in a week’s time and I’ve been busy spring cleaning and sewing. It is customary for everyone to be dressed in new clothes for the New Year, and since we usually go visiting grandparents and relatives on the first two days, I will have to prepare 2 new outfits (per child) and that means this year I have 6 outfits to sew! At this time last year I was heavily pregnant and due to pop anytime, so I too tired to sew and I just made do with store bought clothes. This year I made sure I started early, but I’m still cutting it close. I’m only done with 4 out of 6 and I still have to make two matching bags, all before this Sunday. So this post will be short, and it will be just to share with you what I have been busy making for the past few weeks.

For this year, I decided to make them all with a little modern twist, and instead of a straight/fitting shape, I made them more fit and flare. I couldn’t decide on a particular design so I made 3 variations.

Dress #1

swans

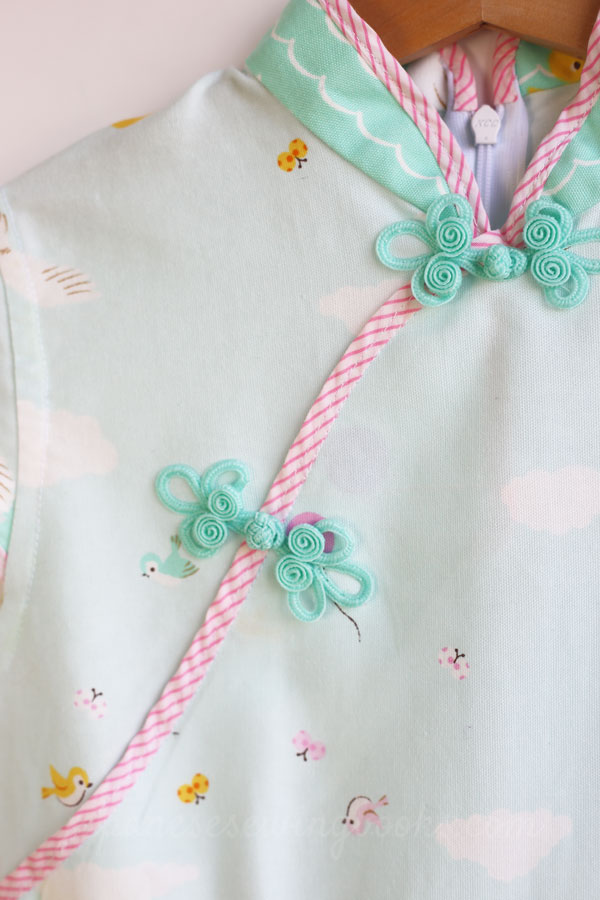
The first dress was inspired by the fabric. The fabric is a gorgeous November Books fabric featuring the story of the Ugly Duckling. I fell in love with the colors of the fabric and I just had to buy it. The panel print along the border meant that I could not actually cut a flare skirt pattern from it, so I had to settle for box pleats instead.

swanbuttons

The dress opening is actually at the back, which makes it easier to sew, since the front is sewn shut. Don’t you love the diagonal bias tape? I had these lying around since I took part in the Mailbox Surprise Series in 2014, and when I placed it over the fabric, it just looked so perfect.

swanssleeves

I added some cap sleeves this time for a variation. See the bias facing in the lower armhole? I learnt this technique from a Japanese sewing book, it makes the armhole look really neat, since cap sleeves end halfway around the armholes.

Dress #2

bluedress

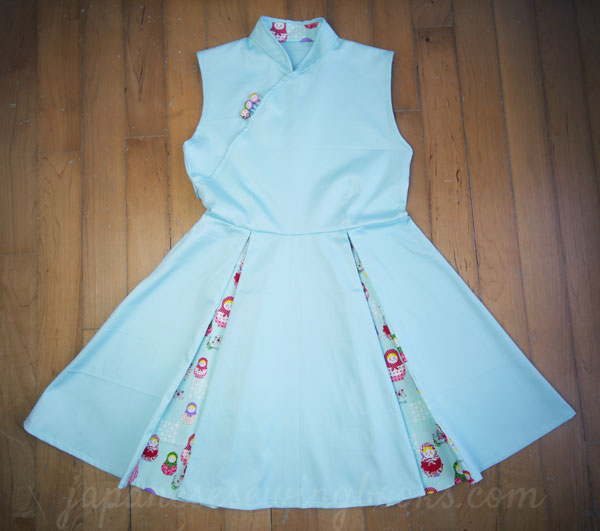
Moving on to Dress #2. The photos can’t do justice to the beauty of this dress. I had some problems with the white balance and as I also had to take photos on different days, so the color looks different in the different photos but I don’t have time to adjust it further. The design of this dress was inspired by a modern cheongsam for ladies that I saw some time ago on the internet. I think it was my cousin who showed it to me, when she asked if I could make a similar dress for her wedding. Back then I had yet to venture into making these dresses for my kids, so I did not have the confidence to take on the project, but the design stuck in my head. I loved how it looks so simple on the outside, but when the dress is in motion, you can catch glimpses of the cute matryoshka dolls hidden within the box pleats.

bluedress1

I could cut the skirt into a flare shape this time as the fabric was plain in color, so it will not mess up the flow of the prints. You can see how the skirt spreads out because of the flare pattern, which is different from the first dress where the skirts are made from rectangular pieces of fabric.

buttonsandcollars

The fabric is a lovely light blue sateen that was leftover from my tiffany blue dress and the matryoshka doll fabric was from Japan.

matryoushkadolls
A close up of the fabric covered buttons. Isn’t it cute! 🙂 I love how it adds a pop of color to the simple looking dress.

Dress #3

And finally, this must be my favourite dress of all.

 
ombredress1

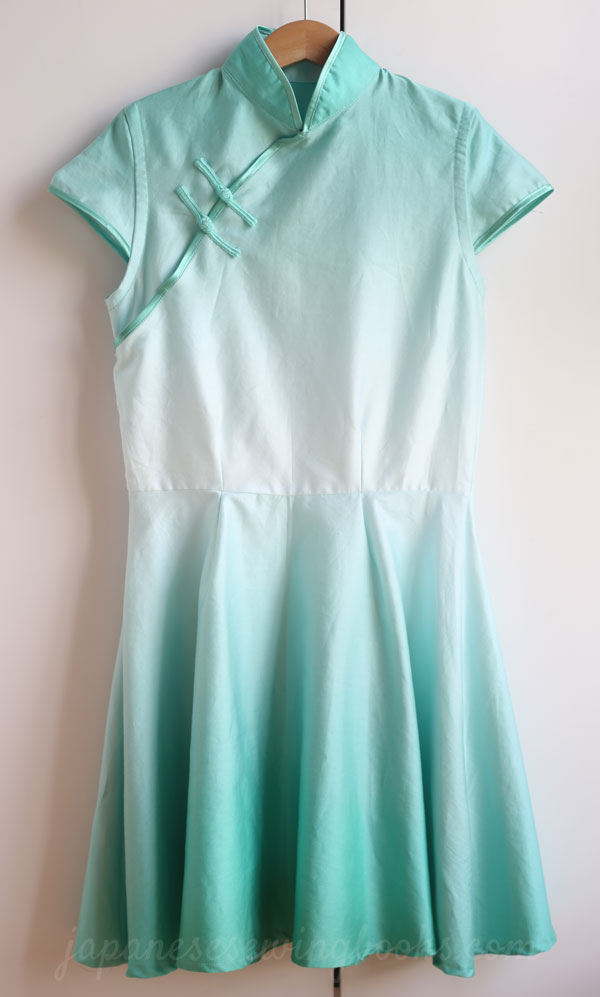
The designs of the first two dresses were quite quickly finalized, and I was going to make two similar dresses from the November books fabric, so that accounted for 3 out of 4 dresses that I had to make. However, I did not have enough fabric leftover to make a second dress #2, and needed to go fabric shopping for the last dress. I brought my eldest along to Chinatown, in search of the perfect fabric, and we found it! It is a Japanese fabric produced by Junko Matsuda for Daiwabo-tex, and it has the most beautiful gradient effect I have ever seen. The fabric itself is also silky to the touch, has a sheen on the right side, and drapes wonderfully. The color? Spot on. There is another color in a beautful bluish purple, which I am leaving for another day. I can’t bear to use up all of it at once!
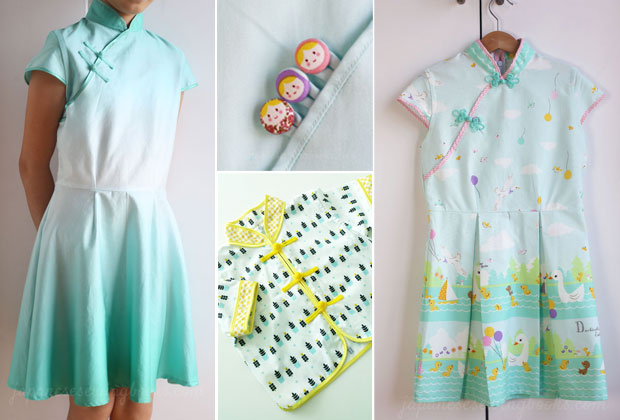
ombredress

The gradation of the colors meant that cutting the pieces for the dress had to be done really precisely and carefully. This dress really brought out the perfectionist in me. I actually made a mistake when cutting out the top pieces, and the color did not match at the waistline. I could not stop thinking about it, whether to go ahead and sew or to waste the pieces and cut all over again. I cut them out all over again, which explains why it took so long for me to sew three dresses.

ombrebuttons

I used the simplest Chinese knot buttons. Going with the mantra – Less is more.

ombreskirt

See the beautiful drape of the skirt? The draping called for a flare skirt pattern definitely. It took me a while to cut this piece out as I was afraid that since the gradation of colors is running horizontal, cutting a flare pattern instead of using a horizontal rectangular shape will destroy the flow of the color blending. Thankfully it is not that obvious and the fabric still looks heavenly. 🙂

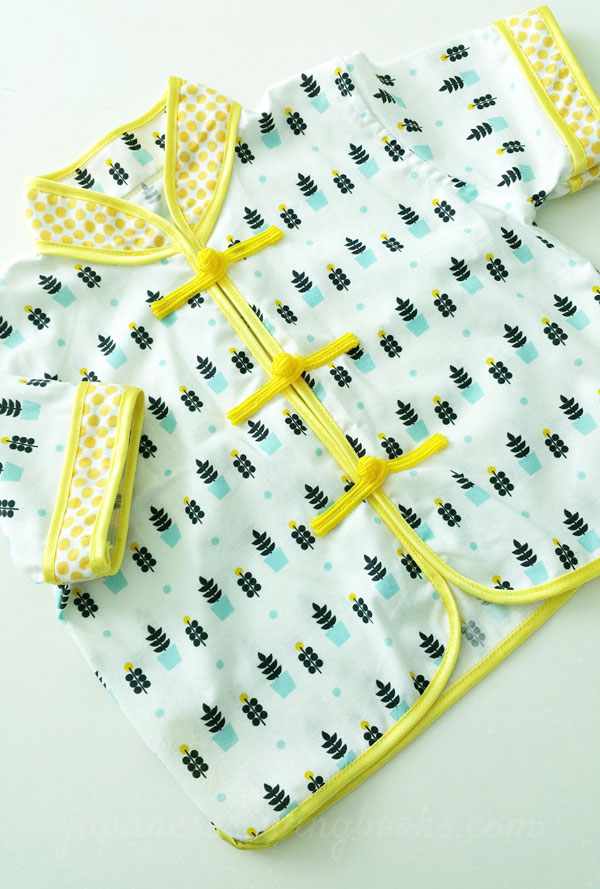
Just one more picture to share. This is a little boy’s shirt that I made for my soon-to-be one year old. Oh how time flies! I basically made it using a standard shirt pattern, but lowered the necklines so that the standup collars won’t actually be too bothersome or hot. You know how fussy one year olds are with their clothing. ;P I added some yellow trim and bias just to make it look more festive.

boysshirt

For those of you interested in making your own cheongsams/qipao, you can follow my free tutorial here -> http://www.japanesesewingbooks.com/2014/01/13/free-girls-qi-pao-chinese-dress-pattern-and-sew-along/ There are free patterns and also a link to a video tutorial on youtube.

Are you sewing/have you sewn your Cheongsam for the new year? If you have sewn a dress using my free pattern, do post it on my Facebook page. I would love to see it and share it with everyone!