This will be a series of posts to guide you through the steps of making a dress using a Japanese sewing book pattern. Hope that this will be useful especially to beginners or those of you who have just bought one for the first time and can’t wait to try!
Step 1 – Find the size chart, and choose the appropriate size. You can always just choose based on the height (身長)but sometimes it is not accurate, and also because some dresses are meant to be loose or tight fitting, so it’s always better to follow the bust/waist/hip measurements.
Step 2 – Look for the pictures of the garment you with to make. In this book it is labelled with lowercase alphabets. In this example we will use the garment “a”. Under the description, you will find the page number of the instructions.
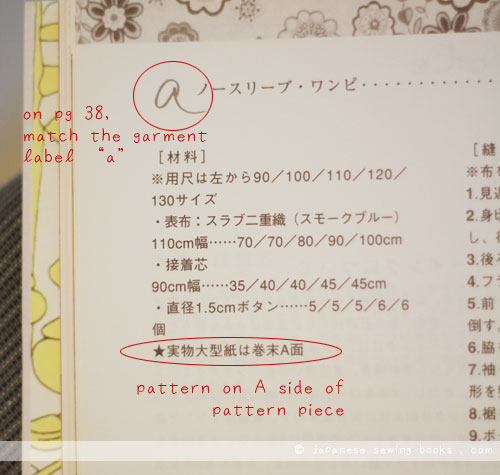
Step 3 – Going to page 38, check the garment name “a”, and find where the patterns are located. In some books there are more than one pattern piece. In this book, there is one piece attached with two sides “A” and “B”. The instructions above tells us that this garment’s pattern is located on the A面 which simply means side A.
Step 4 – Before you go to the pattern piece, have a look at the cutting layout on the same page as the instructions. You will need this diagram to know how many pattern pieces you will need to trace. You will need this diagram again later on to layout the pieces on fabric for cutting.

Step 5, detach pattern piece from book carefully, look for side A.
Step 6 – Look for the lines marked for garment “a”. Each piece is marked with the garment part as well.
Step 7 – start tracing! Note that some books with similar designs may have different set of lines (for slight differences like bodice length/skirt length) So always follow the ones marked with the garment name. in this case, do not stray away from “a”! 🙂
Step 8 – Last step, label and mark pattern piece before cutting out.
Step 9 – check layout diagram again to make sure you have all the pieces you need.
Next week, I will move on to cutting of the fabric, where we will cover tracing the patterns onto the fabric, and marking seam allowances.


No Comments